A how to for Creating maps For Use with Simutrans
by Joker
There are many ways to create a map for Simutrans. Some are easier then other, but in this tutorial we will focus on the easiest and most accessible means of creating a map.
Tools required:
Any Paint like or drawing program. ( Ex: MS Paint, Paint Shop, Gimp, etc. )
A program for converting file types ( Ex: Irfanview )
For the purpose of this tutorial, we will use MS Paint for Windows XP and Irfanview.
Lets Begin.
Step 1.
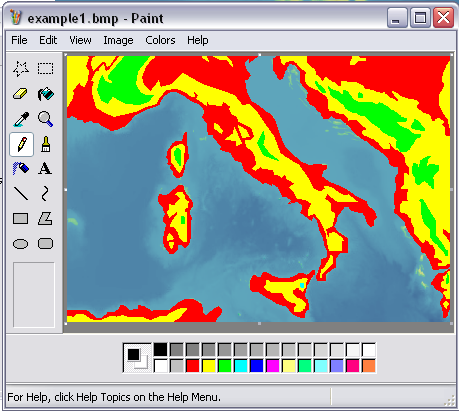
Search the internet for a "shaded relief" or " Physical " map of the region or area you wish to use. Any map will do. For this example we will use a map of Italy and the Surrounding area. (See example 1)
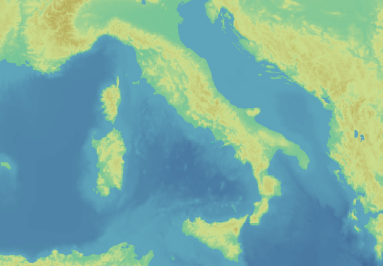
Save the map and open it in MS Paint.
Step 2.
Now that you have the map open, some smaller steps need to be taken to help facilitate the easy conversion of the map into Simutrans format.
First we will need to change some of the colours in the colour palette. This step makes the map creation process much easier in the later stages, but is not necessary.
Starting with the"dark red" ( or the 3rd colour from the left ) on the top row, we will change each colour there to a different grey. Using the following RGB scale figures, change the top row of colours to grey. ( You will need to define custom color to change the colour)
- R=128 G=128 B=128 ( Ground level )
- R=139 G=139 B=139
- R=150 G=150 B=150
- R=160 G=160 B=160
- R=171 G=171 B=171
- R=182 G=182 B=182
- R=192 G=192 B=192
- R=203 G=203 B=203
- R=224 G=224 B=224
- R=235 G=235 B=235
- R=246 G=246 B=246
- R=255 G=255 B=255 ( Highest level )
See example 2

Once complete you should have a graduated grey scale in the top row in the colour palette
Step 3.
With the new palette, we are now ready to start. Select the colour RED.from the bottom row and begin to trace the outline of the land. ( If your map does not have large bodies of water and is an inland type map, start by tracing out the lowest levels ex: ground level ) Once you have traced out the basic land form, we can move to tracing out land features. Select the next colour in the bottom row of the colour palette going left from right. You should have selected the YELLOW.. Now start tracing out the next highest level on the map. Continue doing this for each height level on the map using a different colour for each level. Be sure to use only the bottom row and picking the next colour in sequence left to right. See example 4 for details. ( For the purpose of this tutorial, not as much detail has been put in to the map. This is strictly for reference) See example 3.
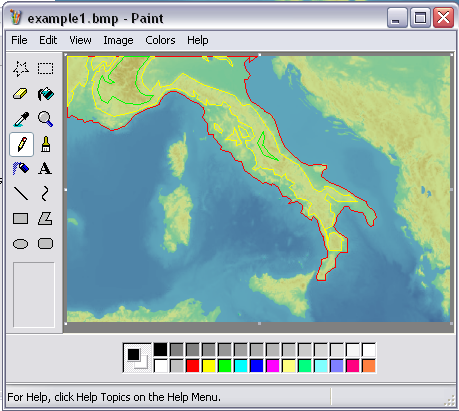
You should end up with something similar to example 3. Continue with this until the entire map has been traced out.
Step 4.
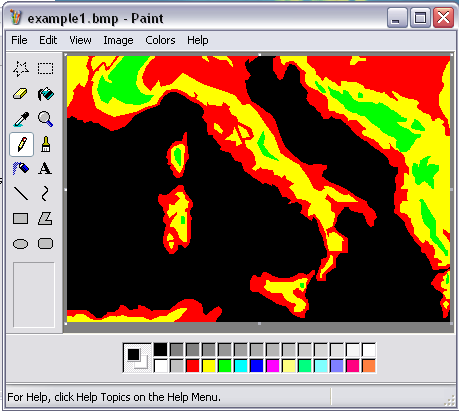
Now that you have finished tracing the outlines, it's time to start filling them in with the corresponding colour. See example 4
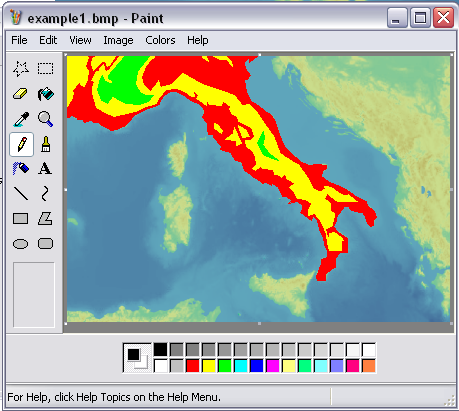
Continue until all the land masses and land features are completely covered by a colour. One you have finished you should end up with something similar to example 5.
I bet your wondering about the water. Water done exactly the same, except for this tutorial we are only going to use one level for the water. This will keep things simpler for now. At the end of the tutorial I will put a complete RGB value list for the all levels for quick reference. For now, fill all the water in with black.
Step 5.
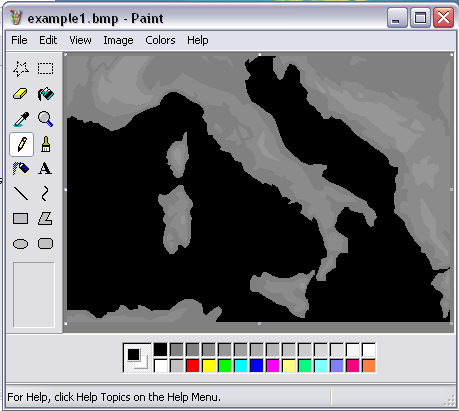
Now that your map has been completely coloured, we can now start by filling in the proper grey for each level. Remember when I had you change all the colours in the top row of the colour palette? If you did so then this part will go very quickly.
Firstly, select the "fill" tool then find the Red in the bottom row of colours in the palette. Directly above that is the proper grey for sea level ground. Select that grey. Good, now on your map fill in all the Red areas on it. Once you have done that, select the grey above yellow in the colour palette and fill in the yellow parts on your map. Continue on with this process for each colour following these steps and when you are finished you should have some that looks similar to this. See example 7.
If you map is looking similar to this then your almost finished! Now to finish the water!
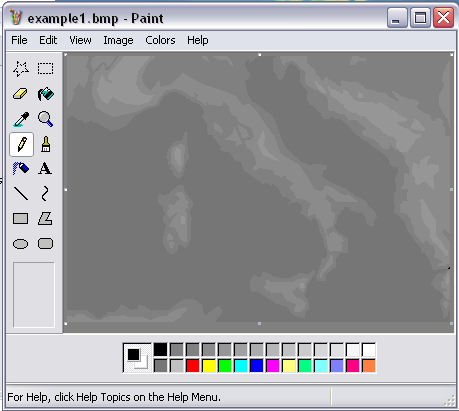
Double click on the white in the bottom row in the colour palette. Again select define custom color and change it to R=118 G=118 B=118. This will set up the grey to fill in all the water to the shallowest depth for Simutrans. Now fill in all the Black on your map with the new grey. See example 8.
There your map is complete! Well ok, almost!
Step 6.
Save your map. It is probably best to save as a .BMP so it does not get fuzzy as it would if you saved it as a JPG.
Simutrans uses Portable Pixel Maps or (.PPM) for its maps. This is where a conversion program comes in handy. For this tutorial we will use Irfanview. You can get it at IrfanView - Official Homepage . It is free and also has many other cool features as well. If you have used Gimp or PaintShop for this they may have the ability to save directly as a PPM file ( be sure that it saves as a binary PPM or it will not work.) and you can skip this step.
Open Irfanview and then open your map. Once you open you map it will appear on screen. Now go to the top and select file from the menubar the find save as. Click it and it will bring you to the save as window. Now in the "save as type " space find the "PPM" extension and select it. A new window will open. Make sure that the " Binary encoding " button is selected. It should be by default, but it is always good to make sure. Leave everything else as is a save your map. Remember to save your map to the default Simutrans save folder. This way you will not have to move it there after.
And there you go!
You have just completed you first custom map!
You're awesome!
Be sure to test your map to make sure it works well.
All if you feel up to it, post it on the forum so others can enjoy as well.
Thanks for taking the time to check out this tutorial.
I hope it has been helpful and easy to follow.
If you have any questions, please feel free to ask for more assistance at forum.simutrans.com in the Documentation, Resources and Sites board.
Cheers and enjoy you new maps!
Phil Sintzel ( JOKER )
RGB Gray level Quick Reference
- R=0 G=0 B=0 (As deep as it gets!!)
- R=11 G=11 B=11
- R=22 G=22 B=22
- R=32 G=32 B=32
- R=43 G=43 B=43 (Lowest ground level possible)
- R=54 G=54 B=54
- R=64 G=64 B=64
- R=75 G=75 B=75
- R=86 G=86 B=86
- R=96 G=96 B=96
- R=107 G=107 B=107
- R=118 G=118 B=118 (Shallowest water level)
- R=128 G=128 B=128 (Standard ground level)
- R=139 G=139 B=139
- R=150 G=150 B=150
- R=160 G=160 B=160
- R=171 G=171 B=171
- R=182 G=182 B=182
- R=192 G=192 B=192
- R=203 G=203 B=203
- R=213 G=213 B=213
- R=223 G=223 B=223
- R=233 G=233 B=233
- R=246 G=246 B=246
- R=255 G=255 B=255 (Highest level)
NOTE: NOT ALL THE WATER LEVELS MAY WORK. THEY JUST A GENERAL GUIDE AS I AM NOT SURE WHAT THE EXACT LEVELS SHOULD BE. YOU MAY HAVE TO DO SOME TESTING WITH THEM TO GET YOUR DESIRED EFFECT